Thursday 28 February 2013

Review of worms eye view shot by Stella

In our storyboard we included a worms eye view shot of the trees which rotated. After having mobility problems with the dolly whilst filming the tracking shots we knew that it would not be possible to create a good shot using this equipment. Because of this we decided to use the camera tripod , but by using this it meant we weren't able to create a shot with the camera directly looking up, as we wouldnt be able to rotate it with the leaver, so decided to use a canted angle.

Here are Charlie's worm's eye view shots:


The first shot was created rotating the camera platform up and down which gave a swooping effect, however it created a jerky shot and although it creates an original perspective it shows the ground and we want a shot focusing on the tops of the trees.
The second shot was created by tilting the camera upwards at a canted angle and using the tripods lever to rotate it. Overall this is a better way of creating this shot, as it produces a shot just of the tops of the trees, which is what we want and the canted angle combined with the spinning creates a disorientated point of view, which could be used to portray the girl's point of view and to suggest she is slowly regaining consciousness. There is also plenty of editing potential in this shot, as we could vary the saturation and focus of the shot to further show the girl's disorientation and to add atmosphere.

Review of tracking shots by Stella

For our piece we wanted a tracking shot of the woods to introduce setting, and to create this we decide to use a heavy weight Dolly .

Review of shots:

We found it difficult to create a smooth tracking shot, as the dolly's wheel would get stuck on debris on the ground, making the shots jerky. Also the uneven surface of the ground meant that a smooth continuous shot was very hard to create.

Here are our dolly attempts below:


We already have tracking shots of the wood planned to feature in between the credit shots of our beginning, so instead of using another  long tracking shot of the woods to establish setting, we experimented with handheld close up panning shots, to give us another option in the editing suite.

Here are Charlie's experimental handheld shots:


Review of shots:

Personally I think these shots are a better way of establishing setting than our initial tracking shot, as the use of handhelds creates the effect of the camera sneaking through the forest, and the use of stark angles make the audience disorientated, which fits our objective of using a restricted narrative. Because of this we will look at using this as an alternative to our tracking shot.

Review of filming in the woods

Wednesday 27 February 2013

TIMETABLE - CHARLIE & KAZ


DATE
LOCATION
CREW
CAST
PROPS
SHOTS
28 FEB
Woods
Charlie & Stella
N/A
N/A
Wood Tracking
2 MARCH
Beth’s House
ALL
Keith, Susan & Extras
Photo, Costume, Mag, Tea
House shots
3 MARCH
HawthWoods
ALL
Izzy & Keith
Bat, Makeup Costume
Wood Death

Tuesday 26 February 2013

Health and safety by Stella

For our film we will be shooting in two locations : a wood and the living room of a house. Before filming there are several health and safety points that we must be aware of, in order to make sure that filming is safe, and to reduce possible risks.


Potential Hazards: Woods
  • In order to have clean shots that don't contain any unimportant setting such as houses, cars driving along the road etc. we will need to shoot reasonably deep into the woods, meaning there is a risk we will get disorientated.
  • There will be debris such as litter, twigs etc that could be potential tripping hazards.
  • Tree roots will also be tripping hazards.
  • walkways and paths may be slippery, which could potentially cause an accident, and may be especially hazardous when carrying equipment to location.
  • there may be holes dug by animals whicch are covered by falling leaves etc. meaning that we are unaware  of their existence.
  • Loose cables from the equpiment may not be visible on the floor and will be potential tripping hazards.
  • Equipment such as lighting stands risk falling over when placed on the uneven ground, which could damage the equipment and those operating it.
Potential Hazards: House
  • A room in a house is generally a restrictive space, and will be even more so when all equipment is set up, so there are risks that things could be knocked and broken when setting up equipment, and tripping hazards when people are moving around the set.
  • Loose cables on the floor will be potential tripping hazards.
  • Overhead lighting might be knocked or damaged when setting up equipment, which has a potential risk of broken glass.
  • Props such as the coffee table which will be used in our scene may be a potential trip hazard, if not enough room is given around it.

How to prevent these risks

Woods
  • When filming in the woods we will establish a safe open space to film and will clear it of all debris, litter etc. before setting up equipment and filming.
  • We will make sure that all free standing equipment is positioned on level services before filming.
  • We will plan the routes that we will use for the tracking shots and clear them to prevent trip hazards and any damage to the equipment.
  • we will make sure all crew and cast are wearing suitable footwear to prevent any accidents to and from the location
  • To prevent becoming disorientated we will make sure our filming location is not too far from a public footpath that leads back to the car park, so we can easily find our way back.
  • To reduced the amount of loose cables on set we will put fully charged batteries in all equipment just before filming, so no extension leads to a power supply need to be used.
House
  • Before filming we will clear the set of any fragile ornaments or items belonging to the houseowner that are at risk of being knocked.
  • All props being used will be securely firmly or placed on even services to avoid them being knocked.
  • All cables will be taped down to prevent tripping.
  • Extra caution will be taken when setting up equipment near or under overhead lighting.
  • Set will placed in areas where there is suffcient space to move around it to prevent any tripping hazards.

Friday 15 February 2013

Stella's shot research: tracking out for establishing shot

To introduced the setting of the house we use a tracking shot, to track out from the girl's photograph to reveal the rest of the room. I practiced this shot in my garage and created it by attaching the camera to the the tripod, then holding it eye level and walking back slowly.  Overall I'm happy with the quality of this shot, as there is little camera movement and the track is smooth.

Stella's shot research: experimenting with tracking

One of the ways we introduce the main character, the girl, in our piece is through a close up tracking shot, that is shot at a high angle. I wanted to experiment with different ways that I could achieve this, as I know that I wont be able to shoot directly over the actress, as it will create a shadow, and I would have to walk with a camera, which would create a shaky shot.

I tried 3 different ways in achieving this shot:

Using the heightening lever on my tripod

For this I shot about a metre away from the doll and used the level to increase the height of the shot's angle, which created the effect of tracking shot tracking up the body.


Good points:

  • It's an easy shot to create, and as the camera doesn't travel directly over the object there is no shadow.
Bad points:
  • The use of the lever makes the camera shake, creating an unprofessional shot.
  • It's very hard to get a clean, controlled shot.

Moving the camera away from my body

For this shot I zoomed into the Barbie Doll so the shot was at close up range and then slowly extended my arms, whilst directing the shot downwards, to create a gradual tracking shot.

Good points:
  • Easy to create and does not create a shadowed shot.
  • Easy to control pace of the track.
Bad points:
  • Being a handheld shot, its almost impossible to not have a shaky shot.
  • The further the camera is extended away from you, the less you can see of the shot in the viewer, meaning its hard to see if the shot is composed well.

Using a dolly
For this shot I attached my camera to my tripod and then attached that to a computer chair and gradually wheeled it towards the doll.


Good points:

  • Easy to create a controlled, clean shot.
  • Minimal shaking, so a tight, professional shot can be made.
Bad Points:
  • A dolly can be hard to push on some surfaces.
Conclusion
For the tracking shots I will use a dolly, as this is the surest way to create a tight shot.

Stella's shot practice: spinning worms eye view

In our piece, we have included a spinning worm's eye view shot of the forest, so I decided to practice how I could create this.

I produced this shot by securing a camera to a computer chair, so it was pointing up to the ceiling and then rotated the chair. When I create this shot for real, I will use a dolly.

Possible viewing contexts by Stella


Student Film Festivals
A good place to show our film would be a student film festival, like London independent film festival
which allows anyone to submit a film for fees as little as £ 45 for a short film. If our film was selected to be shown at the festival, it would give the film good exposure, as film enthusiasts, agents and journalists   are the target audience for this event, so if people liked what they saw, our film would be publicized by word of mouth.

Cinema

In order for our Film to be seen nationwide, it would need to have a similar budget to Hollywood blockbusters. After doing some research, I discovered that most Hollywood blockbusters cost on average $200 million. A helpful article for seeing where the money is spent on blockbusters can be seen here. Even though we are an amateur film production company, so our director, screen writing and acting fees would be considerably less, a lot of special effects and stunts would be needed to make our film realistic, which would be extremely expensive. Because of this we would not have the money to market our film worldwide. However we could use independent cinemas.

The Duke of York Cinema in Brighton, would be a good place to show our film, as being an independant cinema, it screens a huge variety of different films.


Our Animatic with audio


Zoë Atherton

 Props
 A gun that's realistic and black is illegal to show in the open and also you would have to add animation of gun fire which could look tacky. So instead we are going to use a baseball bat for the murder weapon.

An older mean guy in a black shirt holding a baseball bat with a threatening look Stock Photo - 2993427

Costume
 He will also wear a black leather jacket as the material is cold and strong, often worn by powerful or strong characters in films. With this, he will wear black trousers and a black top. When he is filmed he will be less easy to see in the woods, which will make a more uneasy atmosphere.


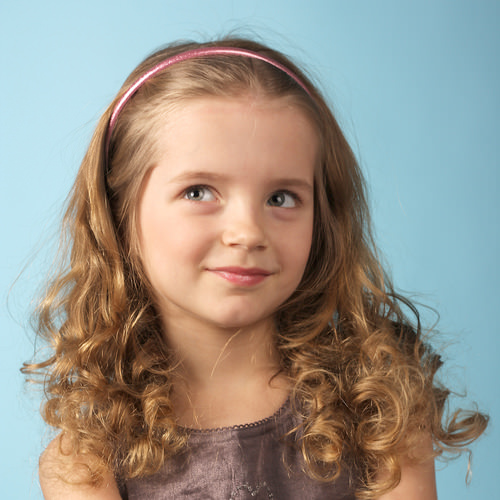
The daughter will wear something innocent, perhaps floral, and with soft pinks/ pastel colours. The huge contrast in clothing between the father and daughter will illustrate how sinister the father is.

Makeup
To get a bruised effect from the baseball bat on the daughter we will:
Wet the applicator brush slightly (too much water will make it runny) and color the brush with the dark blue/purple eye shadow.


Apply your "bruise" on desired area. Make it about the size of two quarters.


And rub some non-powdery, apple-red blush around the edges for a raw, reddish look after you've achieved the level of darkness you want.


Hair
The daughters hair will be curled for a bouncy, innocent look.

Thursday 14 February 2013

Stella's shot research: filming without getting glare

In our film we will be including a shot of a photo frame, which means there is a risk that a glare and reflection will be shown in the shot.

Because of this I decided to try out different ways to prevent glare and reflection and to work out what shot would work the best.


The video shows four different shots. Here are their details and analysis of their effectiveness:
  • Shot 1 : a close up of a picture with a white background and darker image, with ceiling lighting behind. This worked well as there was minimum reflection and glare, as by having the lighting behind my body didn't create a shadow. Also the use of white blocked out the reflection.
  • shot 2: a lighter coloured image with ceiling lighting overhead. My reflection is very visible and there is also a slight glare.
  • Shot 3 : track out from close up to medium long shot with ceiling lighting overhead. The close up is a good shot, however the more I track out the more visible my reflection is. Therefore the best shot for this would be a close up or big close up.
  • shot 4 : experimenting with shadow. The closer to the camera I am the more shadow there is in the shot. To prevent shadow I will shoot the shot at arms length and not lean over the camera.

Conclusion
To create a shot with little reflection and glare I need to:

  • use lighting behind he and make sure its overhead lighting.
  • Use an image with a white background or printed onto a white background, with a solid, dark-coloured image.
  • make sure Im not leaning over the camera or holding it too close to my body.

Wednesday 13 February 2013

Sound by Kazumi


No dialogue throughout the sequence


Non Diegetic sound
  • background music
Diegetic sound


IN THE WOODS
  • tree
  • wind with leaves
  • crow
  • girl breathing
  • footsteps of the man
  • man gripping baseball bat
  • man swinging baseball bat
  • man hitting girl with baseball bat

examples


LIVING ROOM
  • TV
  • yawning
  • door bell
  • getting up from sofa
  • footsteps
  • door opening


Tuesday 12 February 2013

Lighting Decision by Kazumi


In the woods

Low key portrait lighting tutorial.
  • low key lighting
  • use of reflector (shown above image)
  • dark background
  • reflection of fog
  • nature lights (during evening or early morning)
  • silhouette effects when the man hit the girl
 
I thought this is useful examples for our forest sequence


Living room
  • high key lighting
  • nature light from the windows
  • no shadows
example